With the help of this guide you'll be able to setup an Amazon Elastic Kubernetes Service (EKS) cluster on a custom domain and deploy Paralus on it.
Table Of Content:
- Pre Requisites
- Configuring A User on IAM
- Creating EKS Cluster
- Installing Paralus
- Configuring DNS Settings
Pre Requisites
To setup Paralus on Amazon Elastic Kubernetes Service (EKS) there are a few prerequisites:
- An AWS Account - you can register for AWS account if you don't have one
- A Domain Name - with permission to manage DNS settings.
- Latest version of AWS CLI - Install AWS CLI
- Helm
Configuring A User on IAM
Amazon recommends using a different user with a designated role instead of using the root user. Hence before creating an EKS cluster, you need to configure a user in AWS. This is an important step as without this, you might not be able to connect to your cluster and perform tasks.
Refer to the guide to create an IAM User.
Once you have created the user, keep the Access Key Id and Secret Access Key
In the console, you need to configure your account with aws cli, execute aws configure command and provide the details
aws configure
AWS Access Key ID [none]: <Your Access Key Id>
AWS Secret Access Key [none]: <Your Secret Access Key>
Default region name [None]: <AWS region>
Default output format [None]:
Validate the configuration by executing the following command, you should see the output with the account and the Arn.
aws sts get-caller-identity

{
    "UserId": "ABCDEFG6HIJKLMNOPQ",
    "Account": "1234566788900",
    "Arn": "arn:aws:iam::1234566788900:user/user.lastname@email.io"
}
Creating EKS Cluster
There are two ways to create an EKS cluster:
- From AWS Management Console - refer to this document on Creating an Amazon EKS Cluster.
- Using eksctl utility - refer to this document on Getting Started With Amazon EKS - eksctl - this document uses eksctl
After the cluster is created, you need to update the kubeconfig file. You can do so by using the following command by providing the cluster name and the location.
aws eks update-kubeconfig --name ferocious-gopher-1653447065
Added new context arn:aws:eks:us-west-2:645114859692:cluster/ferocious-gopher-1653447065 to /home/user/.kube/config
Installing Paralus
Add helm repo
helm repo add paralus https://paralus.github.io/helm-chartsInstall Paralus
 helm install myrelease paralus/ztka \
  -f https://raw.githubusercontent.com/paralus/helm-charts/main/examples/values.dev-eks.yaml \
  --set fqdn.domain="chartexample.com" \
  -n paralus \
  --create-namespace
Note: If you're installing this in a production environment, please use values.yaml and configure the values mentioned here as required.
Note: Since v0.1.9, elasticsearch is an optional component. By default, Paralus will use database (Postgres) as the auditlog storage component. If you're doing a fresh install, below are the values.yaml file that you must pass during installation:
Postgres (default): https://raw.githubusercontent.com/paralus/helm-charts/main/examples/values.dev-generic.yaml
Elasticsearch: https://raw.githubusercontent.com/paralus/helm-charts/main/examples/values.elasticsearch.yaml
NAME: myrelease
LAST DEPLOYED: Wed May 25 10:13:48 2022
NAMESPACE: paralus
STATUS: deployed
REVISION: 1
NOTES:
Access the application URL by running these commands: Get load balancer address via: kubectl get service envoy --namespace paralus -o jsonpath='{.status.loadBalancer.ingress[0].hostname}'
Add DNS records of following domains such that it resolves to above address:
console-eks-oss.chartexample.com
*.core-connector.eks-oss.chartexample.com
*.user.eks-oss.chartexample.com Open http://console-eks-oss.chartexample.com in browser.
You can view the recovery link for admin user by running the following command once all the pods are running:
kubectl logs -f --namespace paralus $(kubectl get pods --namespace paralus -l app.kubernetes.io/name='paralus' -o jsonpath='{ .items[0].metadata.name }') initialize-paralus | grep 'Org Admin signup URL:'
Note: It can take upto a few minutes before all the pods are running and you can access the Web UI. You can check the status using
watch kubectl get pods
Configuring DNS Settings
Once the installation is complete, you need to first get the external IP address provided by AWS. You can do so by executing the following command:
kubectl get svc myrelease-contour-envoy -n paralus

NAME                            TYPE           CLUSTER-IP       EXTERNAL-IP                                                                     PORT(S)                         AGE
myrelease-contour-envoy         LoadBalancer   10.100.101.216   a814da526d40d4661bf9f04d66ca53b5-65bfb655b5662d24.elb.us-west-2.amazonaws.com   80:31810/TCP,443:30292/TCP      10m
Navigate to your domain's DNS setting page. The steps for changing DNS settings will vary based on your domain name provider.
While you are on your DNS Setting page, for the selected domain name, you need to add three CNAME records. These will be based on the subdomains provided in the notes section post installation.

Accessing The Dashboard
Paralus is installed with a default organization and an admin user. Hence, after installation, you need to set a password for the user. To do so, execute the command that you get after installing Paralus.
 kubectl logs -f --namespace paralus $(kubectl get pods --namespace paralus -l app.kubernetes.io/name='paralus' -o jsonpath='{ .items[0].metadata.name }') initialize | grep 'Org Admin signup URL:'

Org Admin signup URL:  http://console.chartexample.com/self-service/recovery?flow=de34efa4-934e-4916-8d3f-a1c6ce65ba39&token=IYJFI5vbORhGnz81gCjK7kucDVoiuQ7j
Note: The password recovery link generated while deploying Paralus is valid only for
10 minutes. For any reason if the link is expired, refer to our troubleshooting guide to re-generate the password reset link.
Access the URL in a browser, and provide a new password. In a new browser window/tab navigate to http://console.chartexample.com and log in with the following credentials:
- username:
admin@paralus.local- or the one you specified invalues.yaml - password:
<The one you entered above>
You'll be taken to the projects page where you'll see a default project.

Importing Existing Cluster
Everything in Paralus is grouped into Projects. Each project will have clusters, users and groups associated with it. Hence the first step it to create a new project.
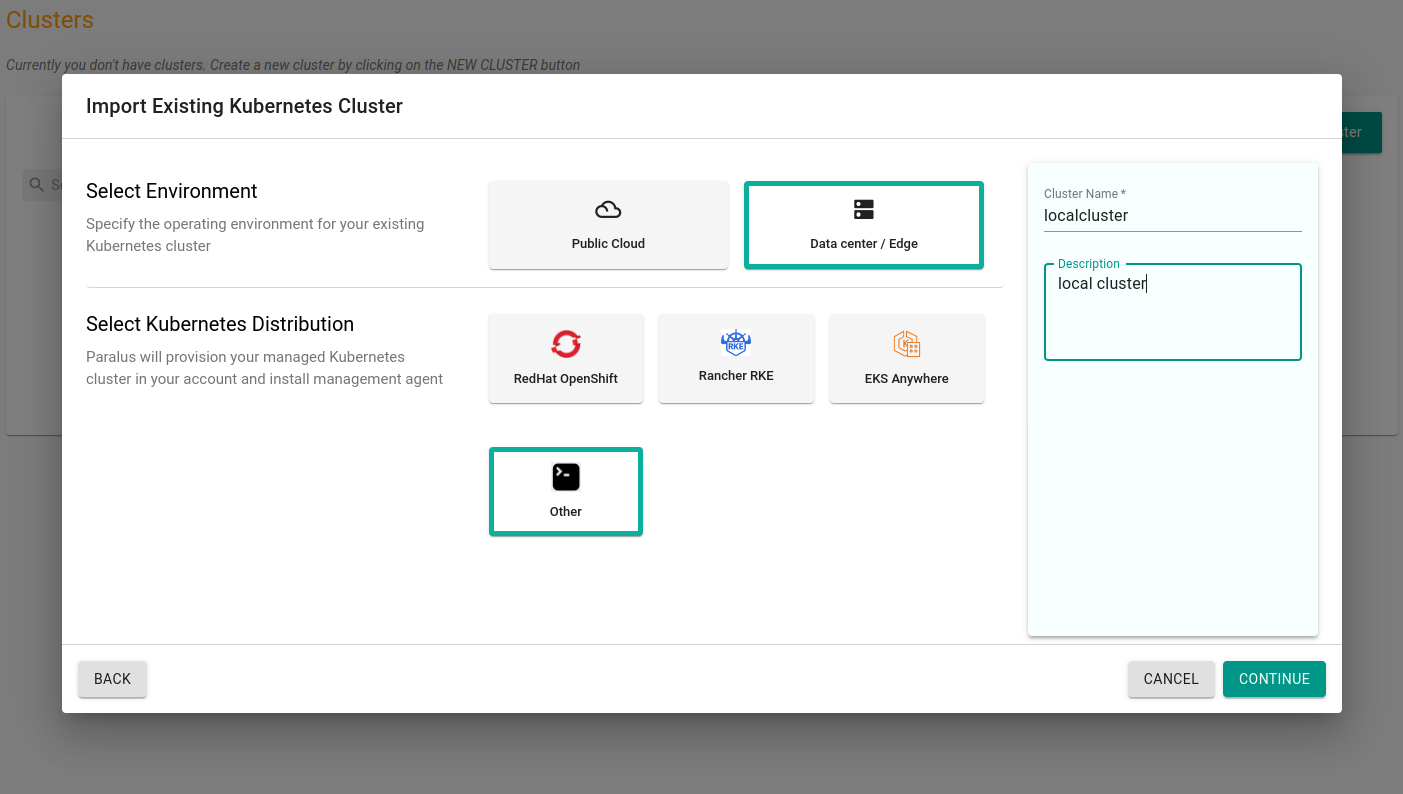
Click on New Project to create a new project and then import a cluster in that project.

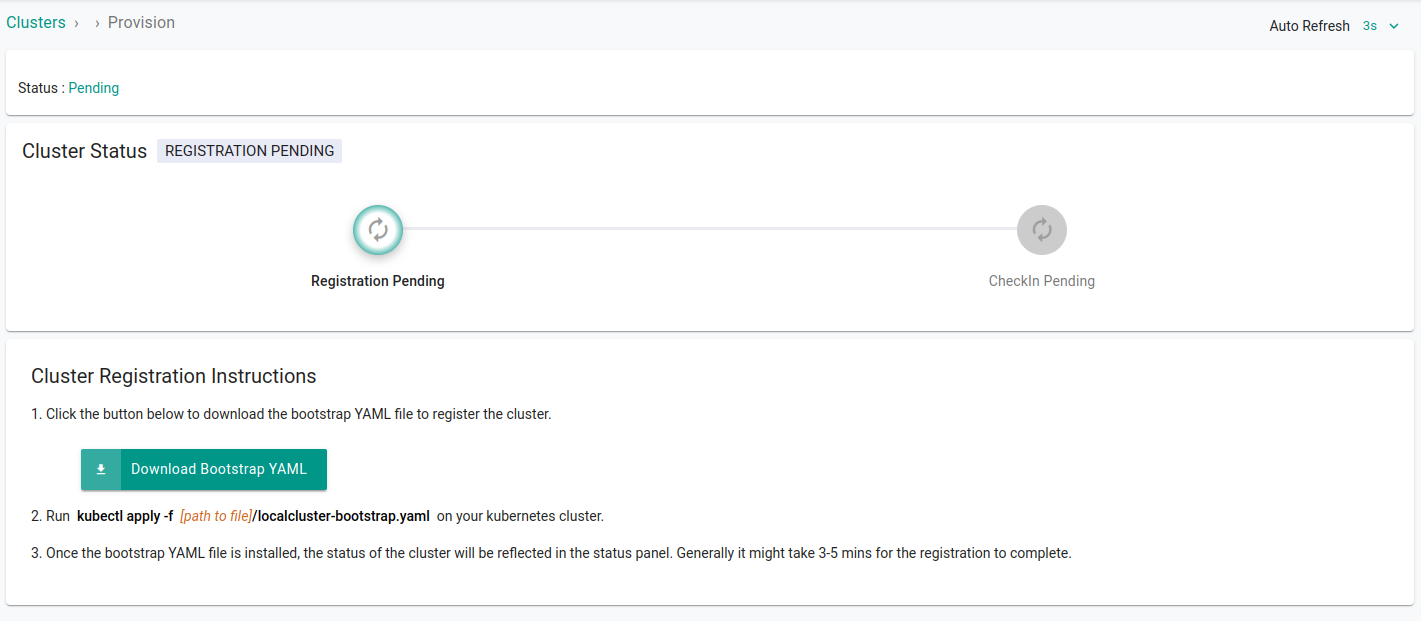
Click Continue and download the bootstrap yaml file by clicking Import Bootstrap YAML. This will download the YAML file that is required to connect your cluster with Paralus.

Apply the bootstrap configuration yaml file
kubectl apply -f mylocalcluster.yaml
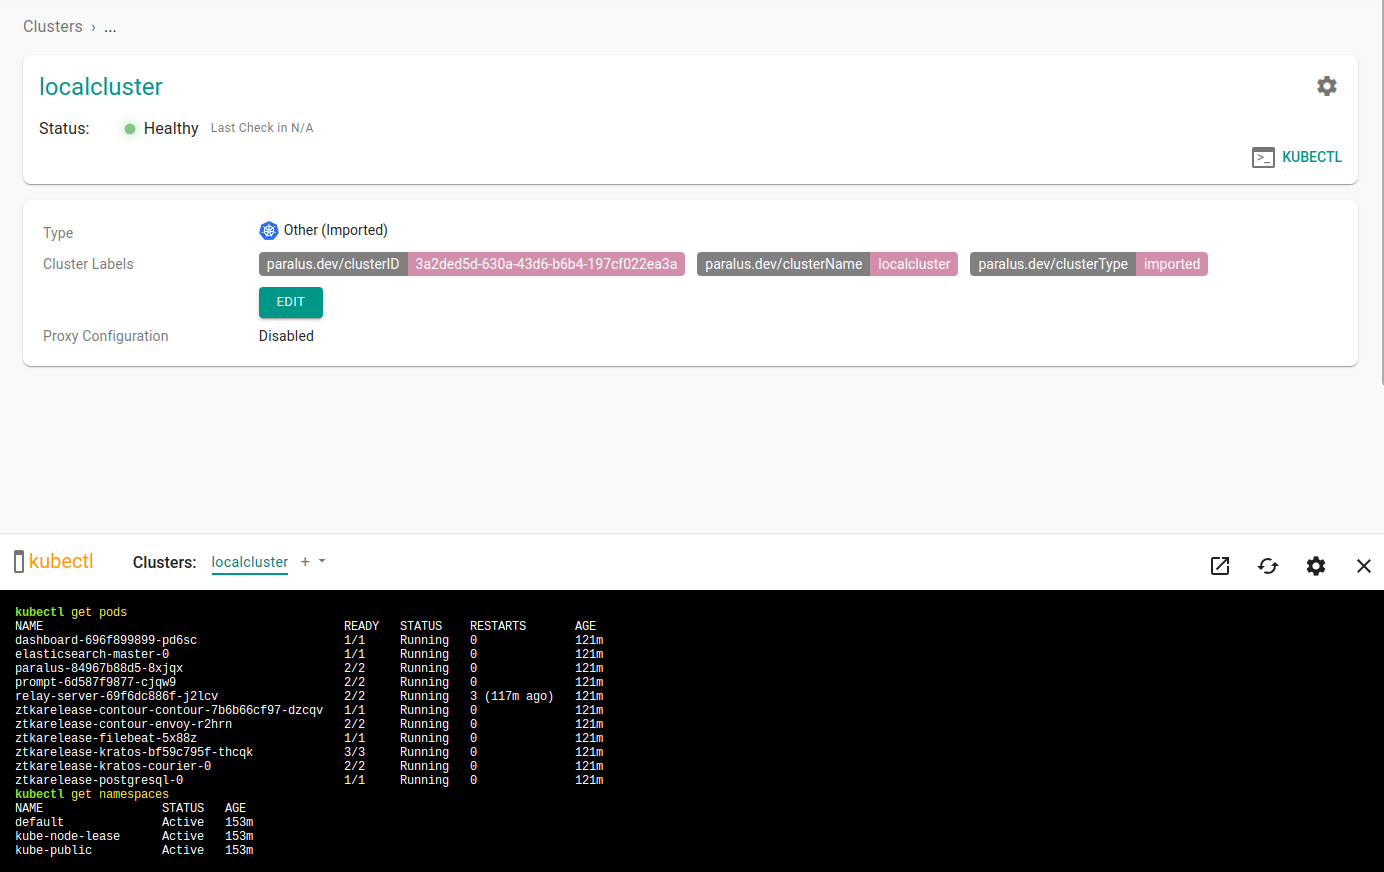
Wait for the changes to take place. On the dashboard you will see that the cluster is imported successfully. It usually takes 3-5 minutes for the status to update.

Select your newly imported cluster and click on kubectl to access the prompt and interact with your cluster from the dashboard.
A kubectl console will open in the bottom half of the screen, enter your kubectl commands to interact with your cluster.

Congratulations! You've successfully deployed Paralus on EKS and imported a local cluster.
Refer to our documentation to learn about various features of Paralus.
